In this course, we will use GitHub Classrooms to manage assignments. Through GitHub, you will have free access to a dedicated Linux workspace called Codespaces, where you can write, compile, and run C++ programs for all coursework. Codespaces is just a web-based instance of visual studio code that is connected to a linux server.
If you prefer, you may use your own local development environment, as long as you are comfortable with configuring your IDE and using Git independently.
§1 What is GitHub? #
GitHub is a web-based platform for software development and version control using Git. It’s a place where developers can store their code, manage and track changes, and collaborate with others. For this course, we will use GitHub to:
- Submit assignments: You will use GitHub Classroom to submit your programming assignments.
- Get feedback: The instructor can review your code directly on GitHub and provide granular feedback.
§2 Getting Started #
To join the class, you will use a GitHub account to join the “Classroom”. This will allow you to view and submit assignments, and grant you access to dedicated workspaces for your coursework.
You may use any GitHub account for this course, including a personal account. If you need to create a new account, visit Github.com and click the “Sign Up” button to create an account. You can use your Los Rios student email or a personal email.
NOTE
The GitHub Classroom bot sends a lot of email notifications. You will need to create an email filter to avoid being overwhelmed by notifications. An example of how to create a filter in Gmail is provided below.
§2.1 Creating a Gmail Filter for GitHub Notifications #
To keep your email inbox clean, you can create a filter to automatically manage emails from GitHub Classroom.
- In Gmail, click the Settings cog icon, then See all settings.
- Go to the Filters and Blocked Addresses tab.
- Click Create a new filter.
- In the From field, enter
notifications@github.com OR noreply@github.com. - Click Create filter.
- Check the Skip the Inbox (Archive it) box.
- Optionally, you can also apply a label (e.g., “GitHub Classroom”) to keep these emails organized.
- Click Create filter.
§3 First Assignment Setup #
Assignments will always be listed on Canvas with a link to the corresponding assignment on Github Classrooms. You will be able to access any assignment workspace through the links on Canvas.
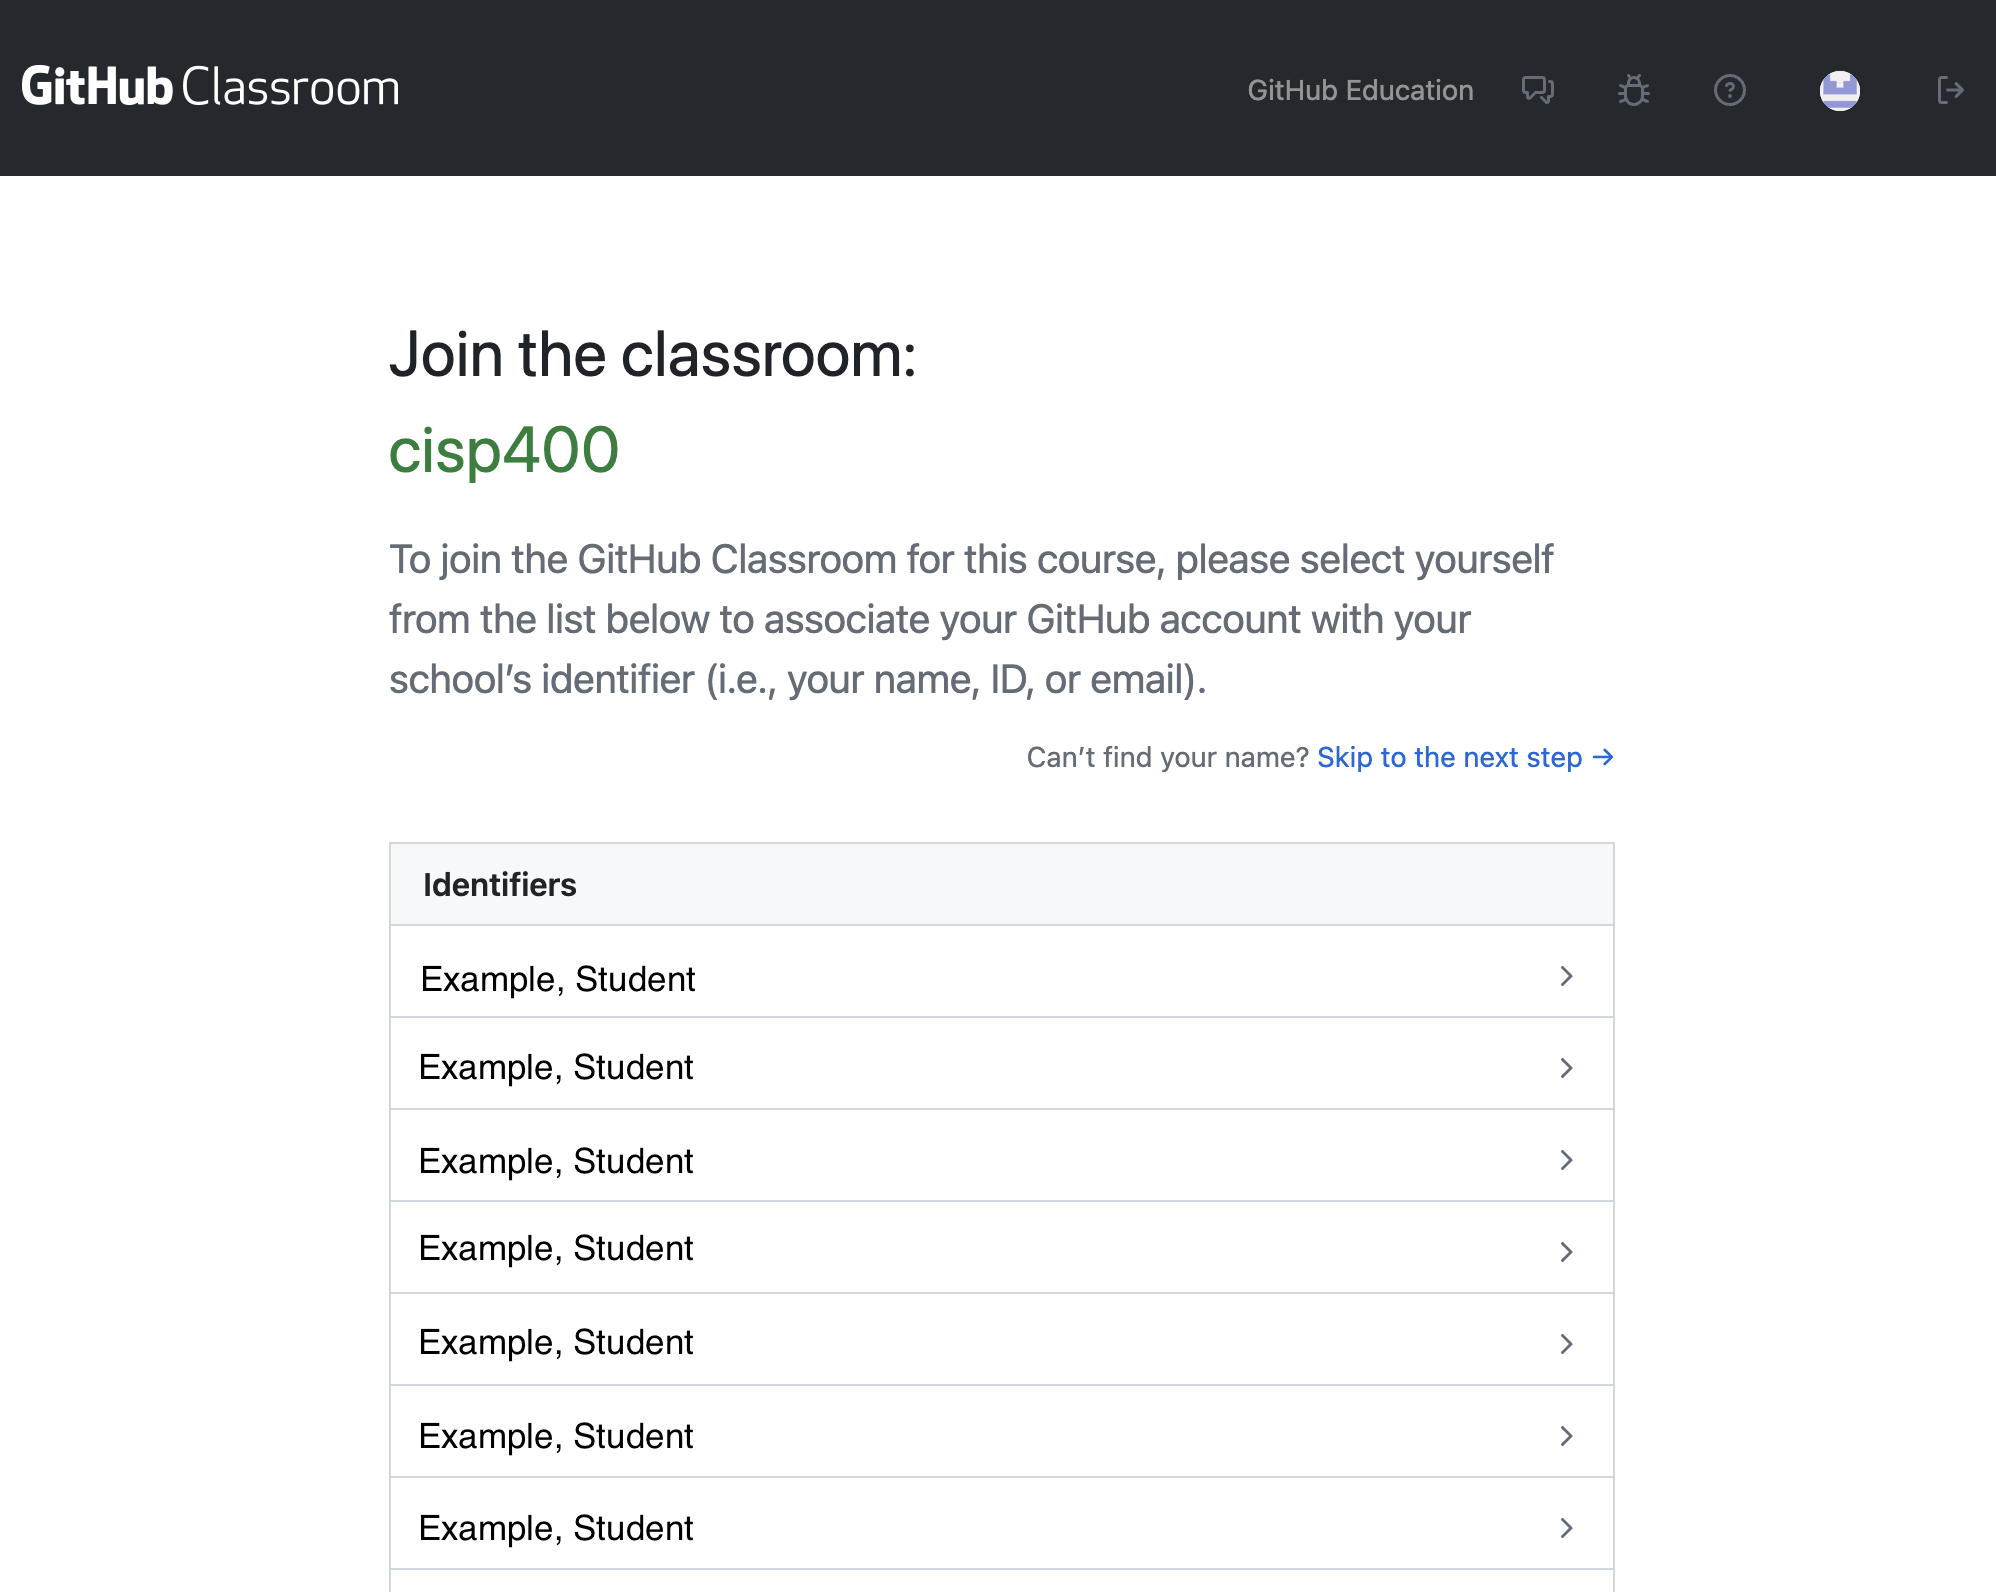
When you open your first assignment, you will be asked to select your name from the class roster. This will associate your GitHub account with the class. If you do not see your name listed, please send the instructor an email or a Canvas message.
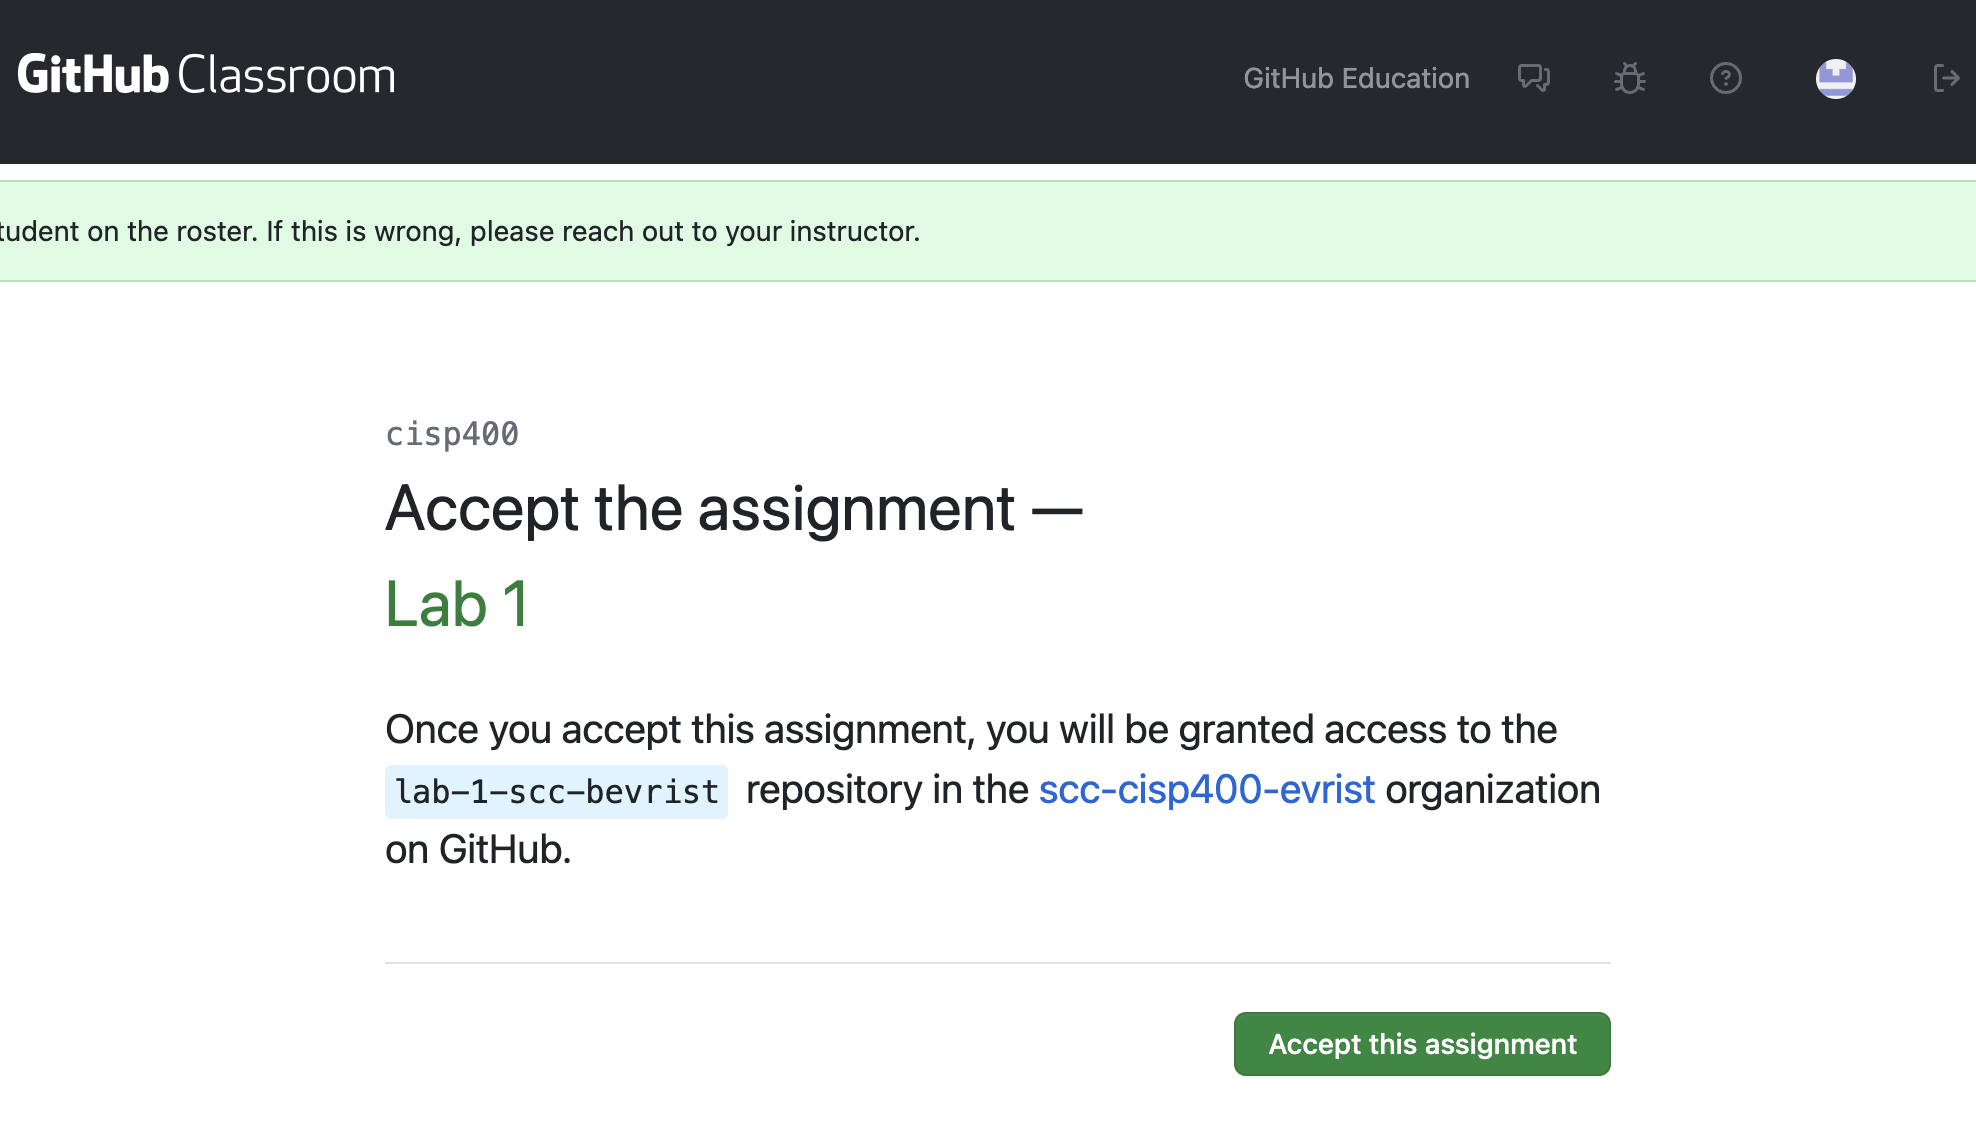
When accepting an assignment, you will be shown a confirmation page.
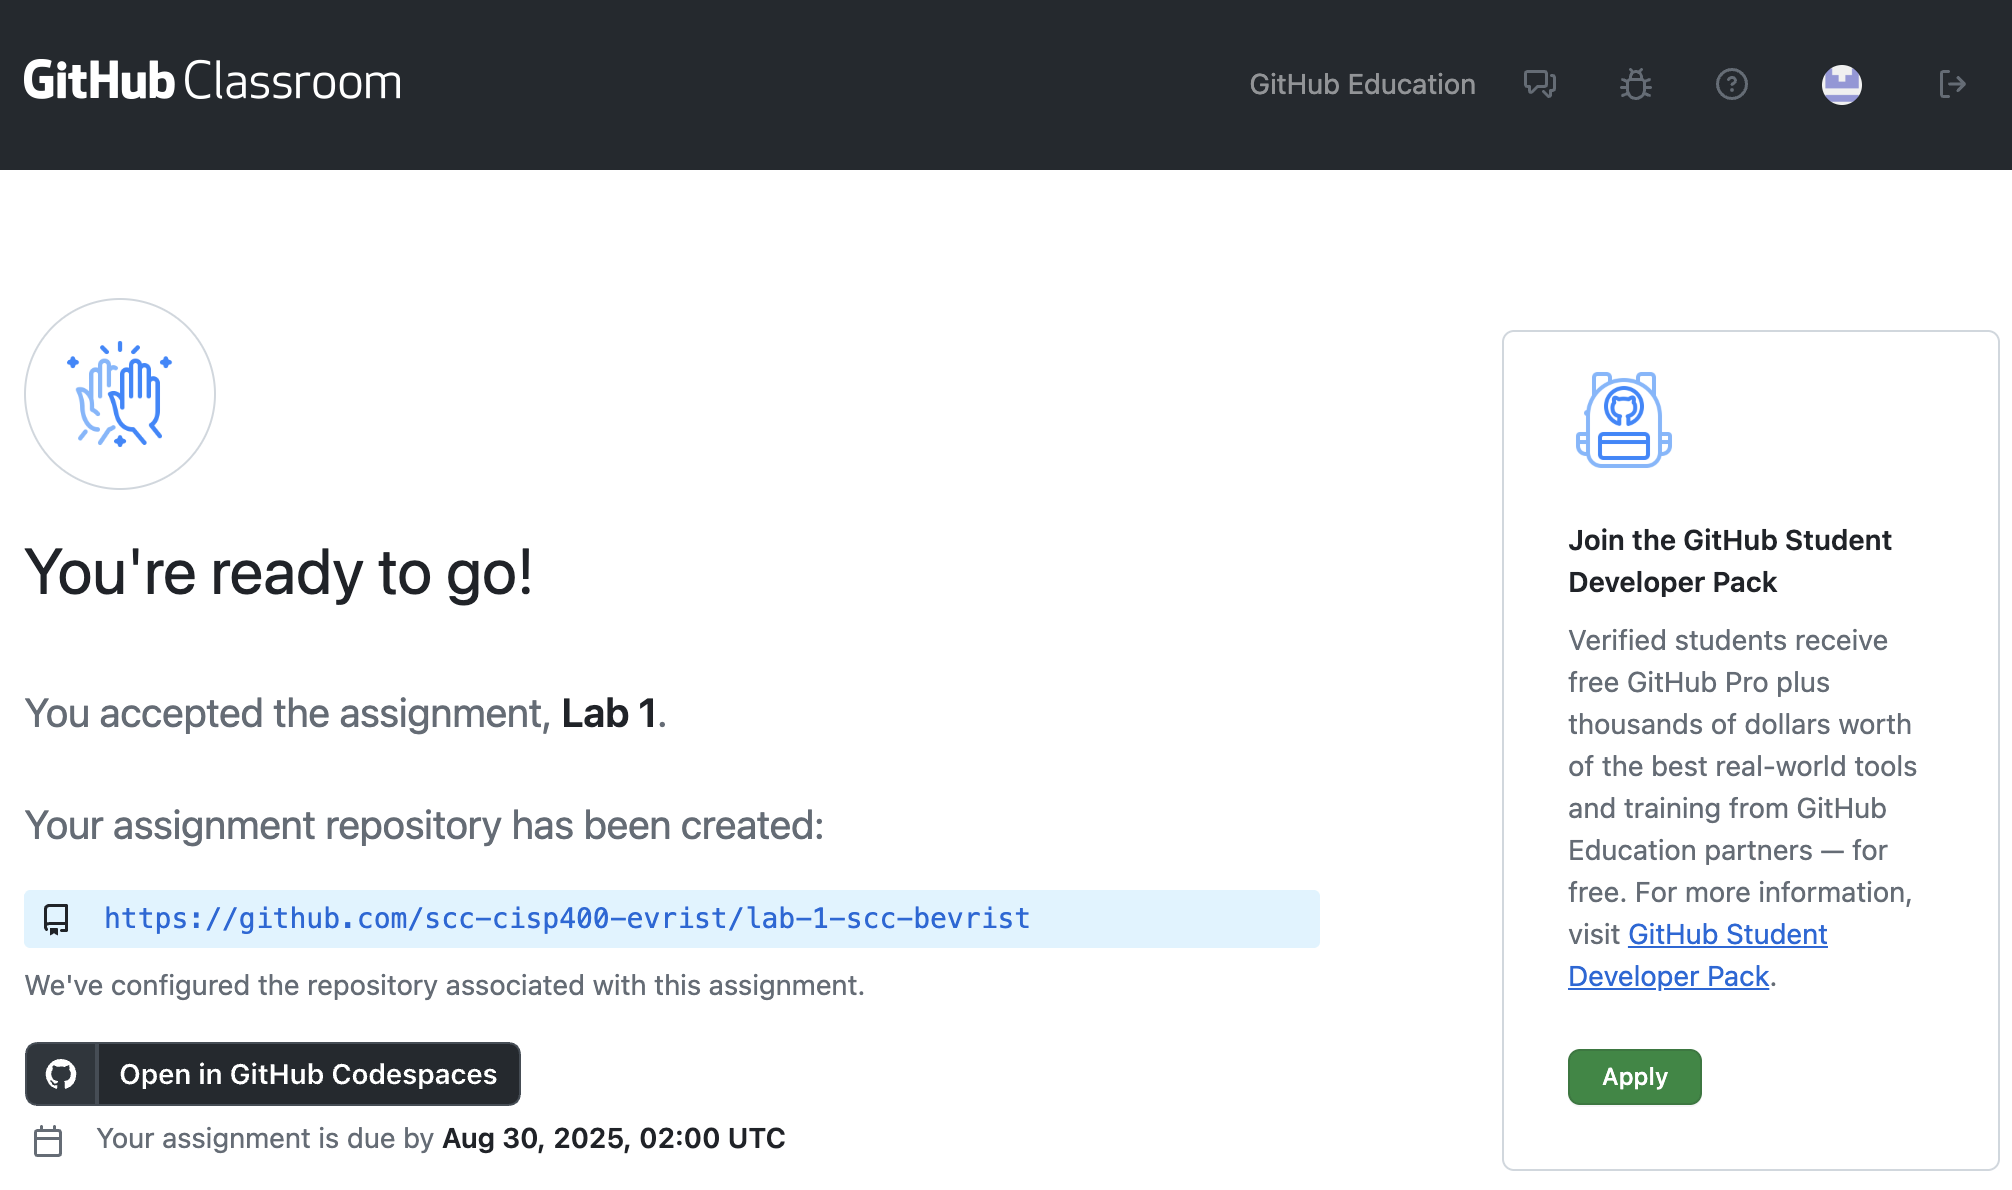
After accepting the assignment, you will be able to open the Workspace.
NOTE
Codespaces works best with Chromium-based browsers, such as Google Chrome, Vivaldi, or Brave. Some features and keyboard shortcuts are broken in other browsers such as Safari and Firefox.
Any time you open an assignment link after accepting the assignment, you will be presented with this page. Note the blue “repository” link, you will need to submit this link along with your lab questions for each assignment. You can click the black “Open in GitHub Codespaces” button to launch your workspace.
§4 Codespaces Walkthrough #
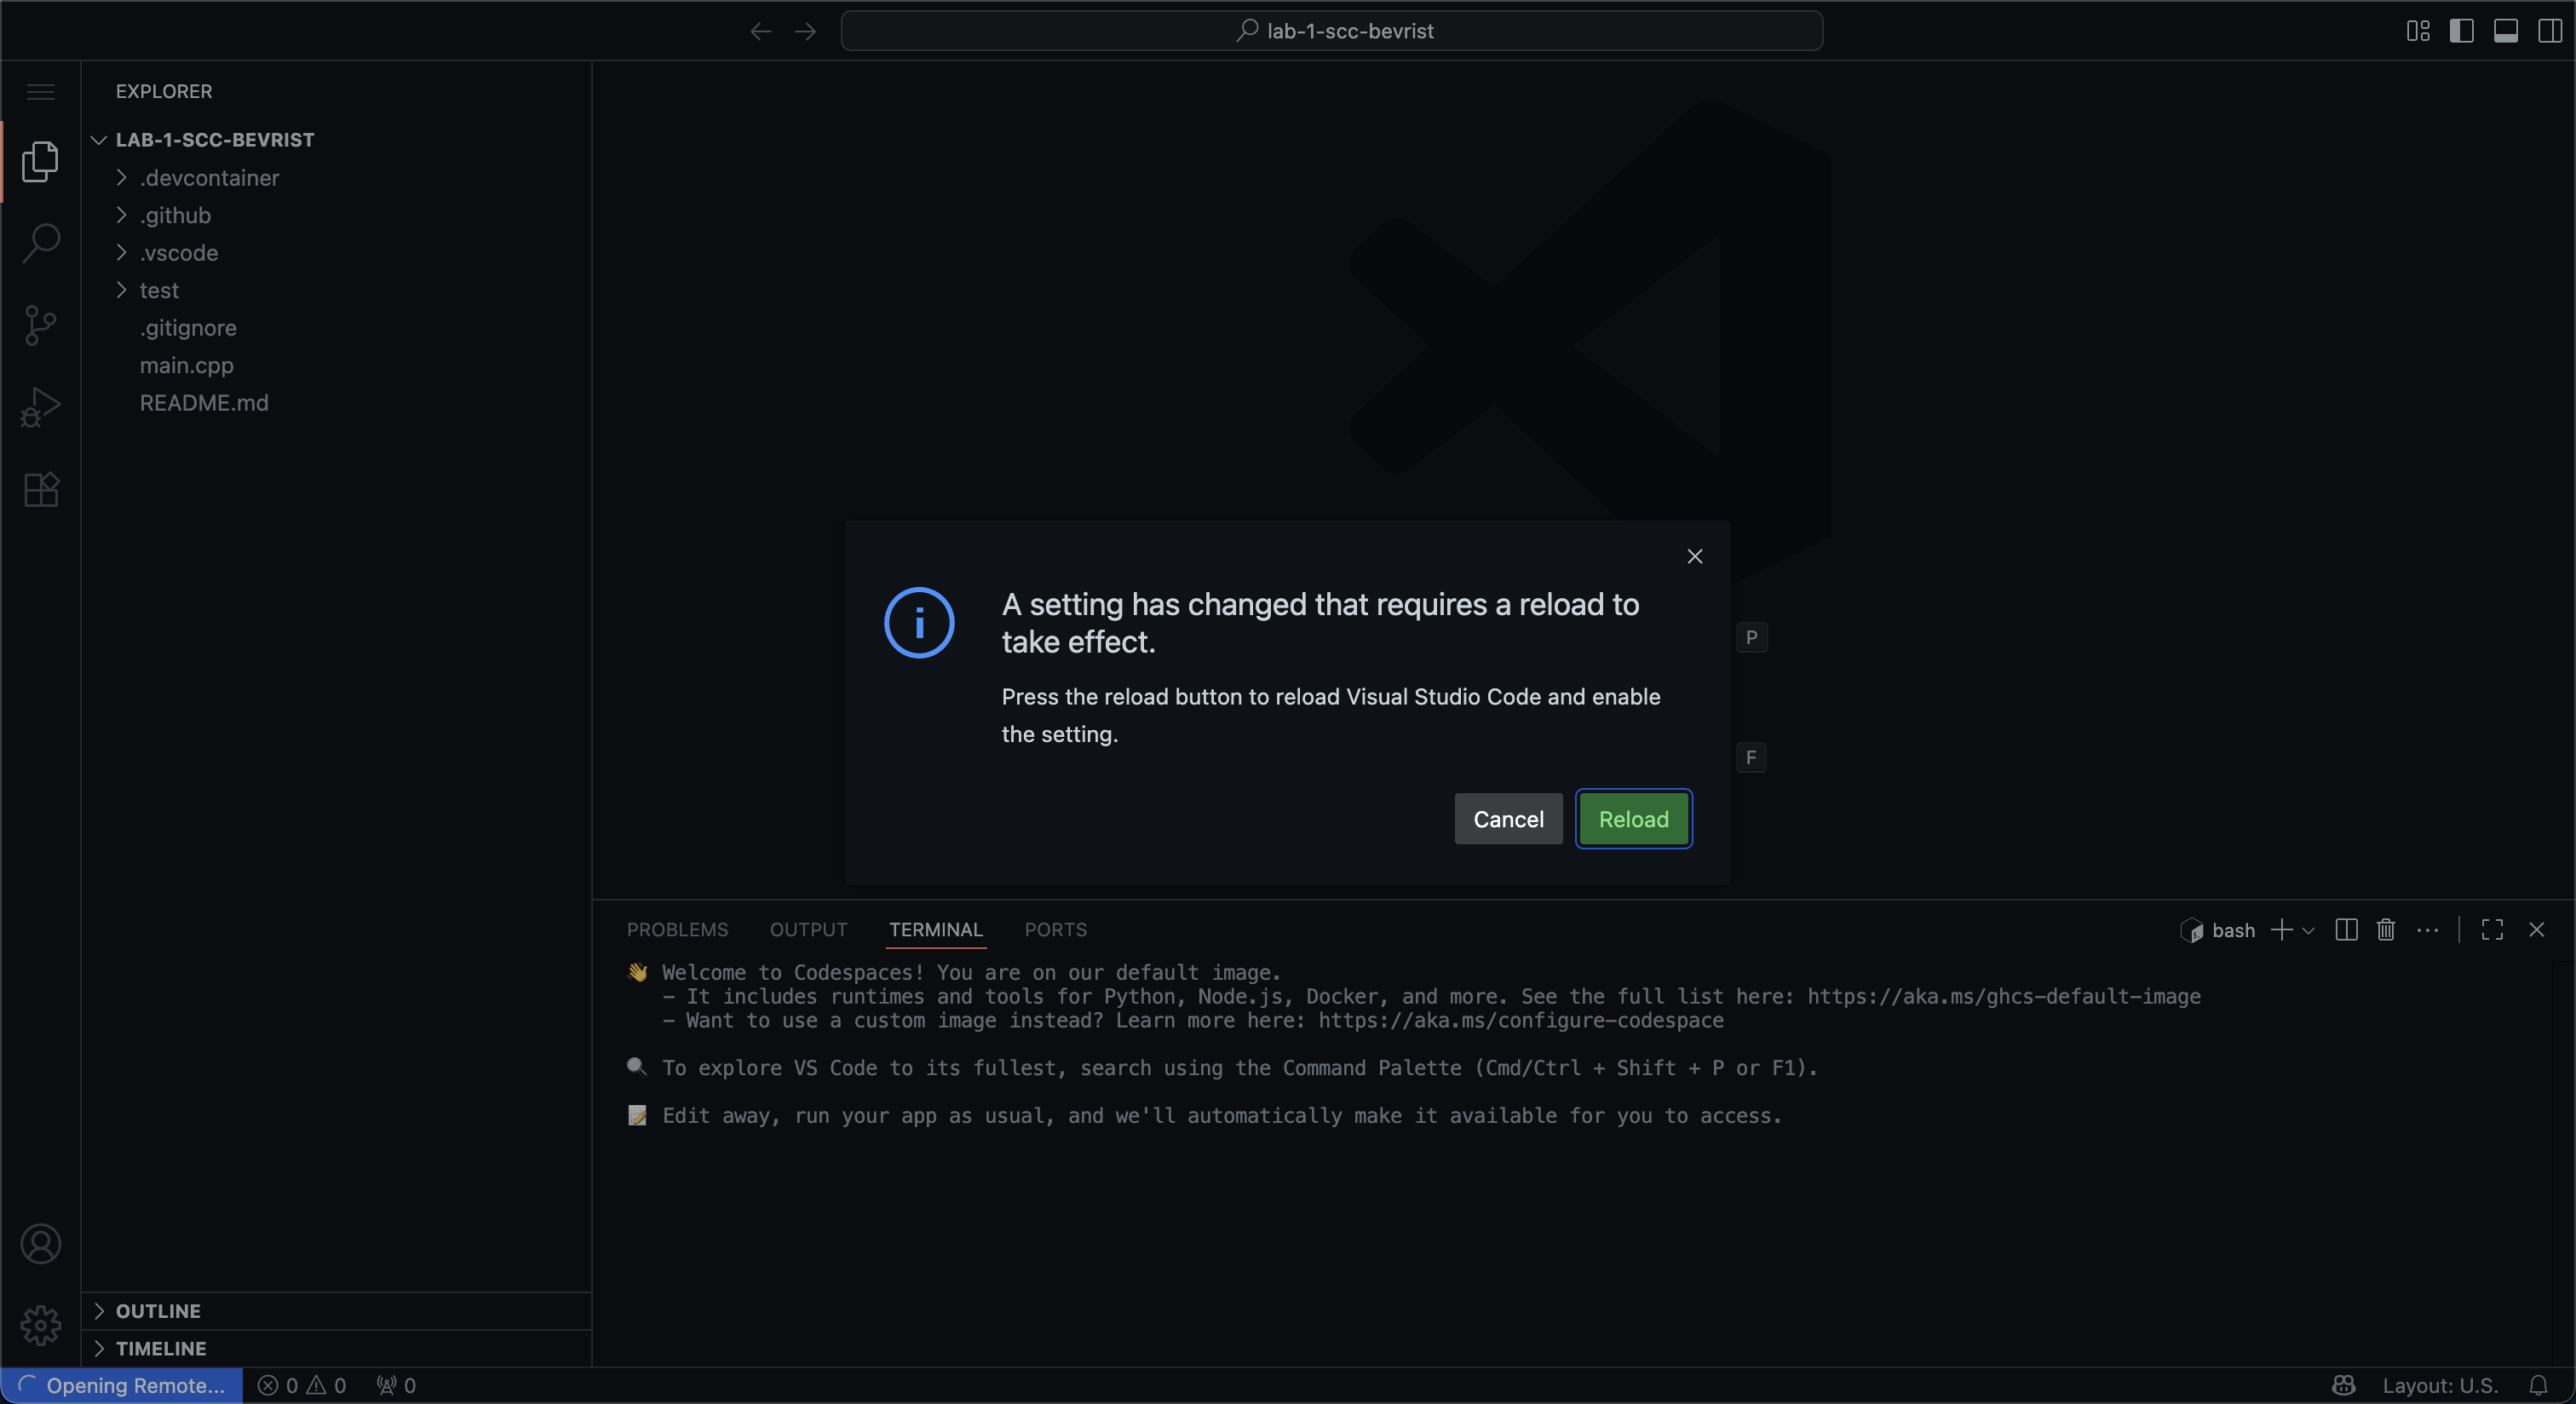
When first opening the Codespace, you may be asked to reload to apply settings. Click “Yes.”
GitHub Codespaces is a web-based version of the Visual Studio Code application. Each assignment and project will come with a pre-configured workspace that is ready for C++ work.
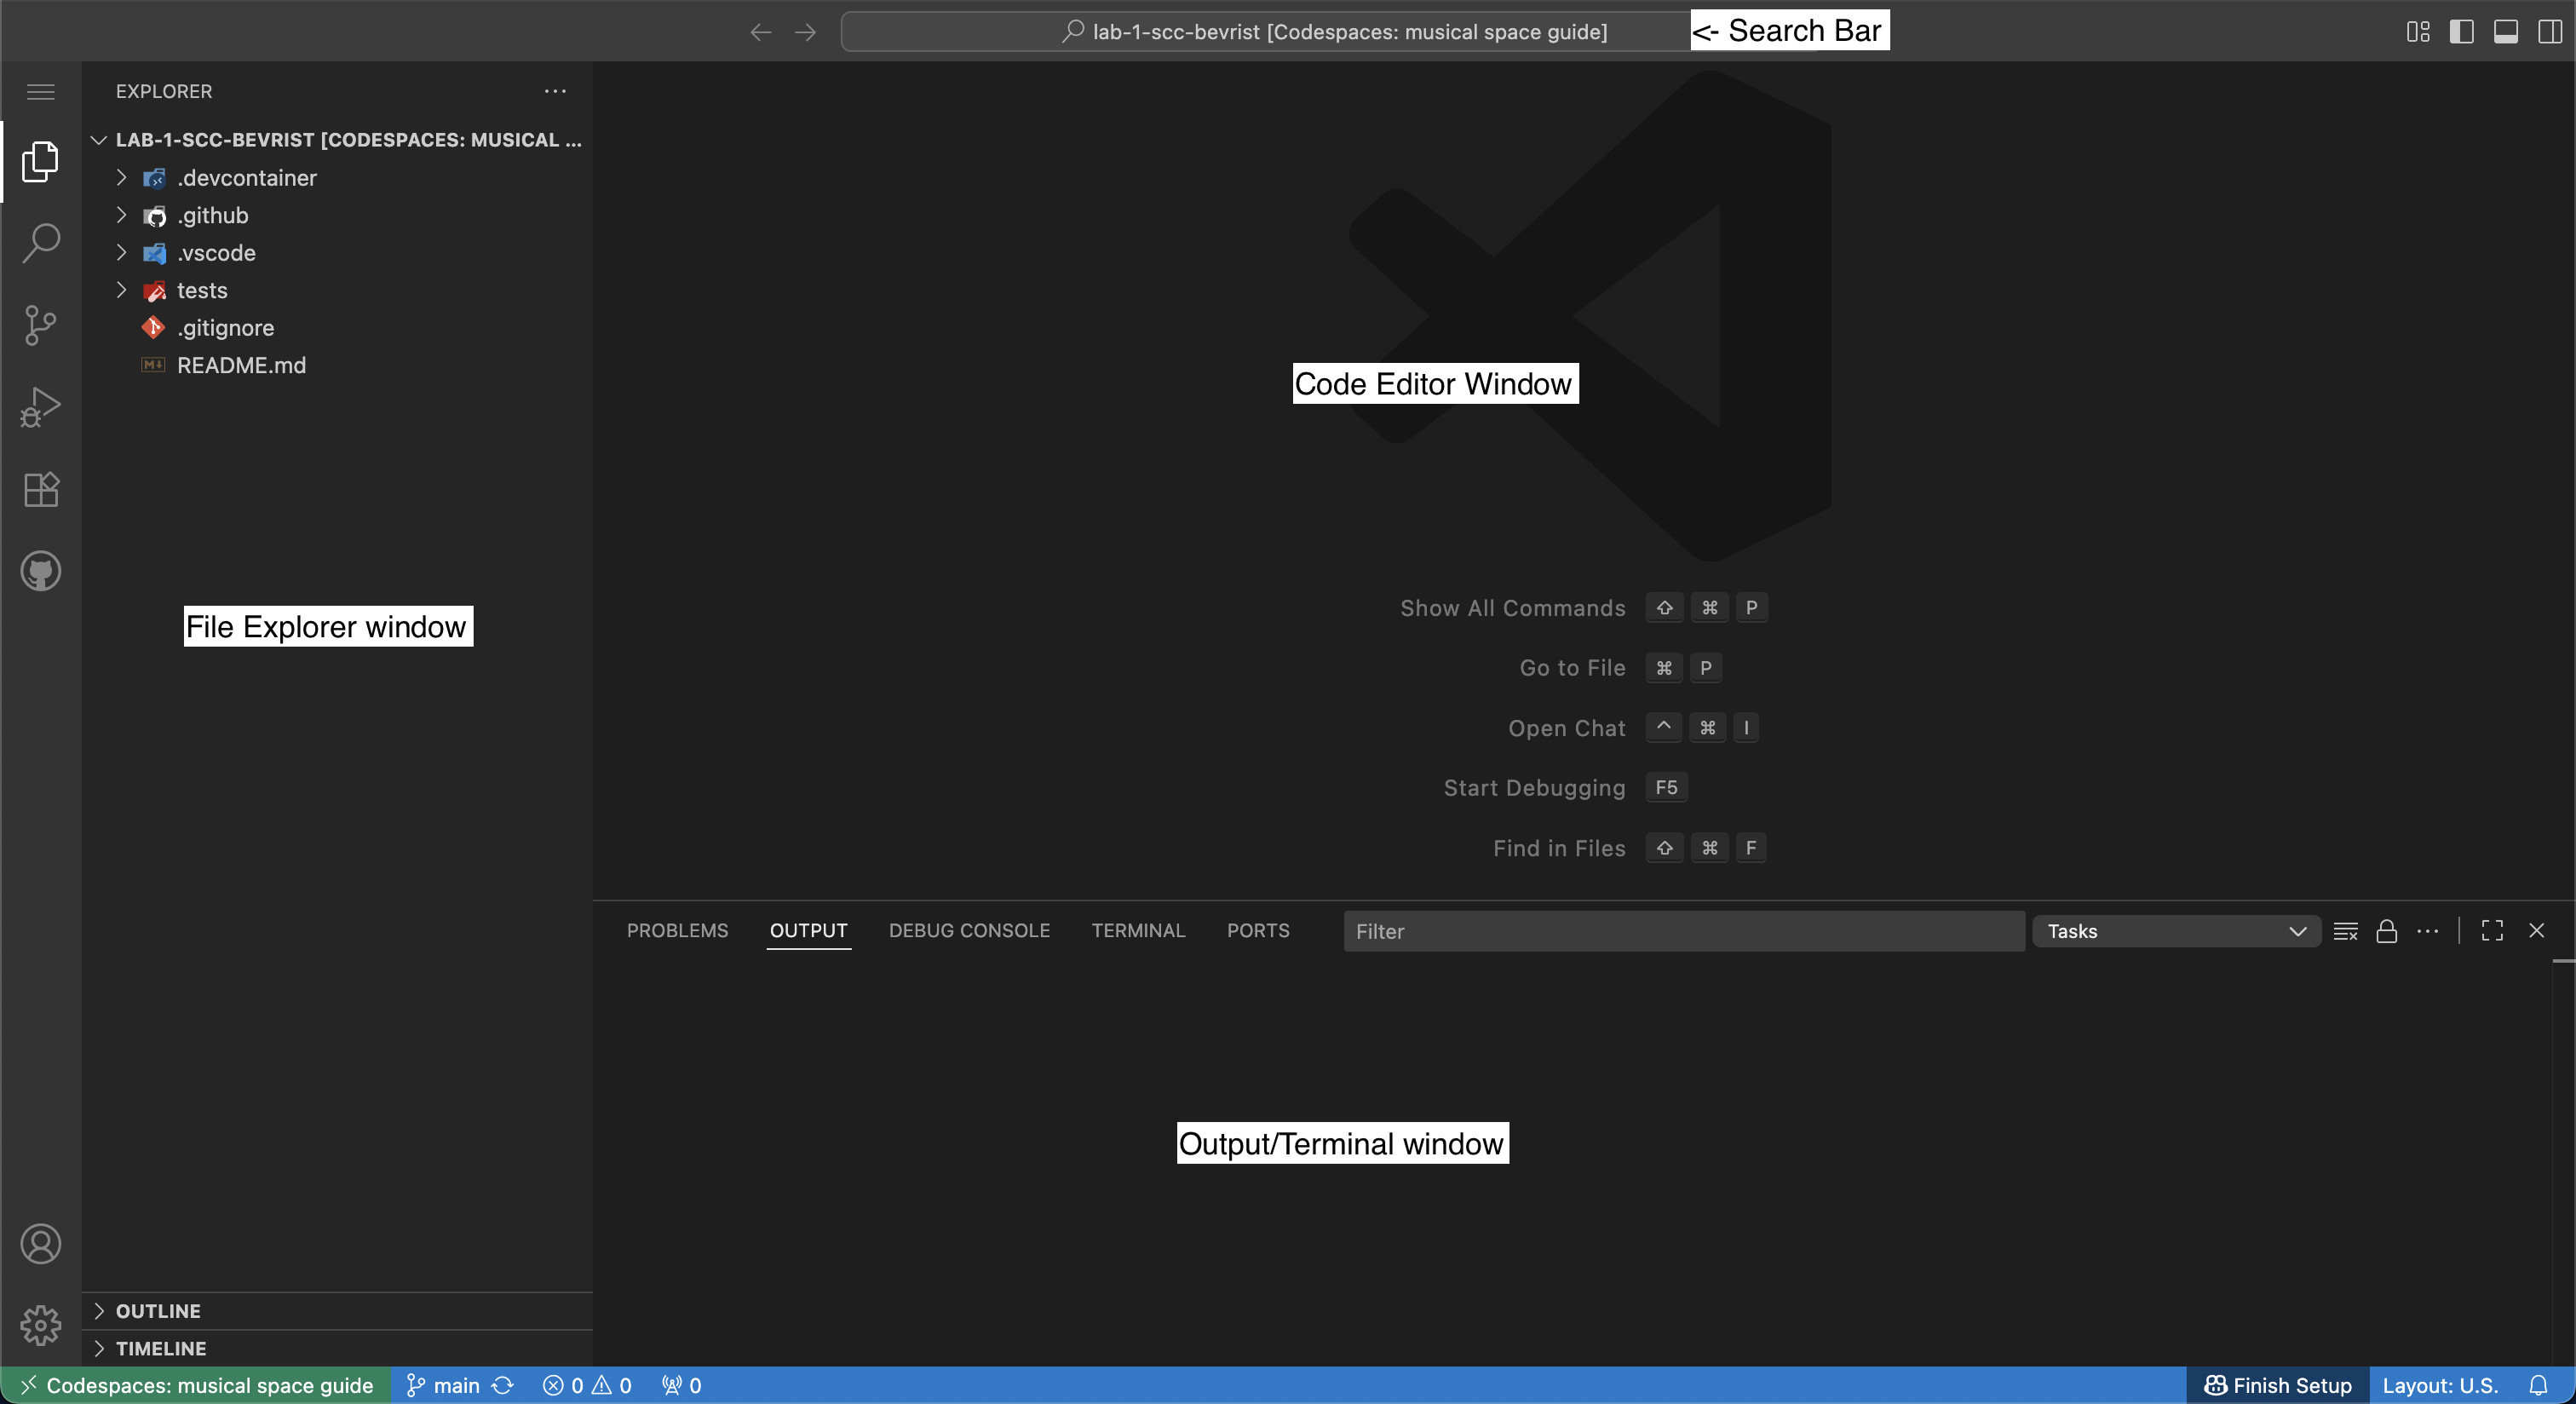
§4.1 File Explorer #
The file explorer allows you to create, rename, move, delete, and open files.

§4.2 Terminal #
The terminal allows you to run commands, such as compiling code or running executables.
The terminal window can be opened and closed by typing CTRL + ~ (⌃ + ~ on MacOS).

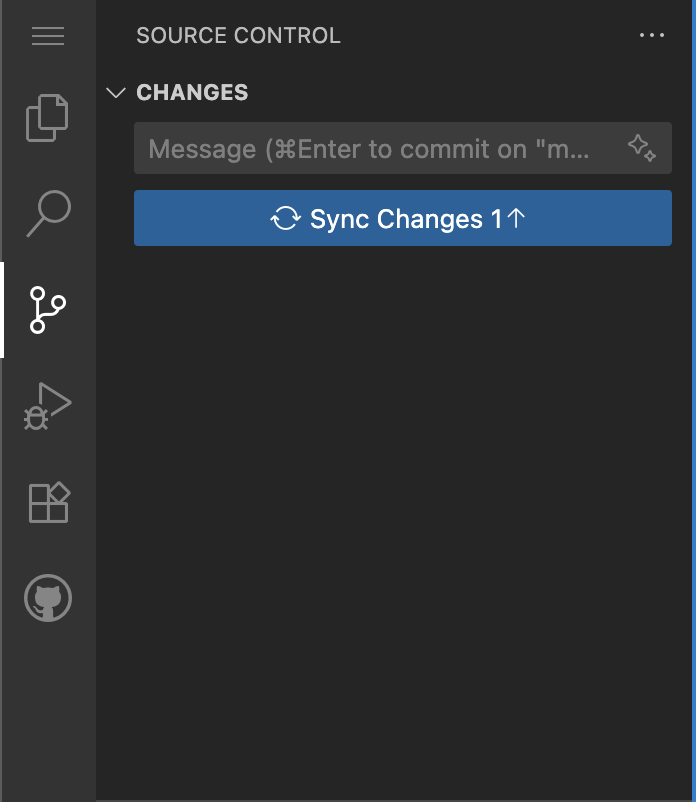
§4.3 Source Control #
The source control tab is used to push your code changes to the server.
Code edits are only stored in your personal workspace. You have to use the source control tab to “commit” your code changes to the server. This is how your code is submitted.
To access the source control tab, click on the source control icon:
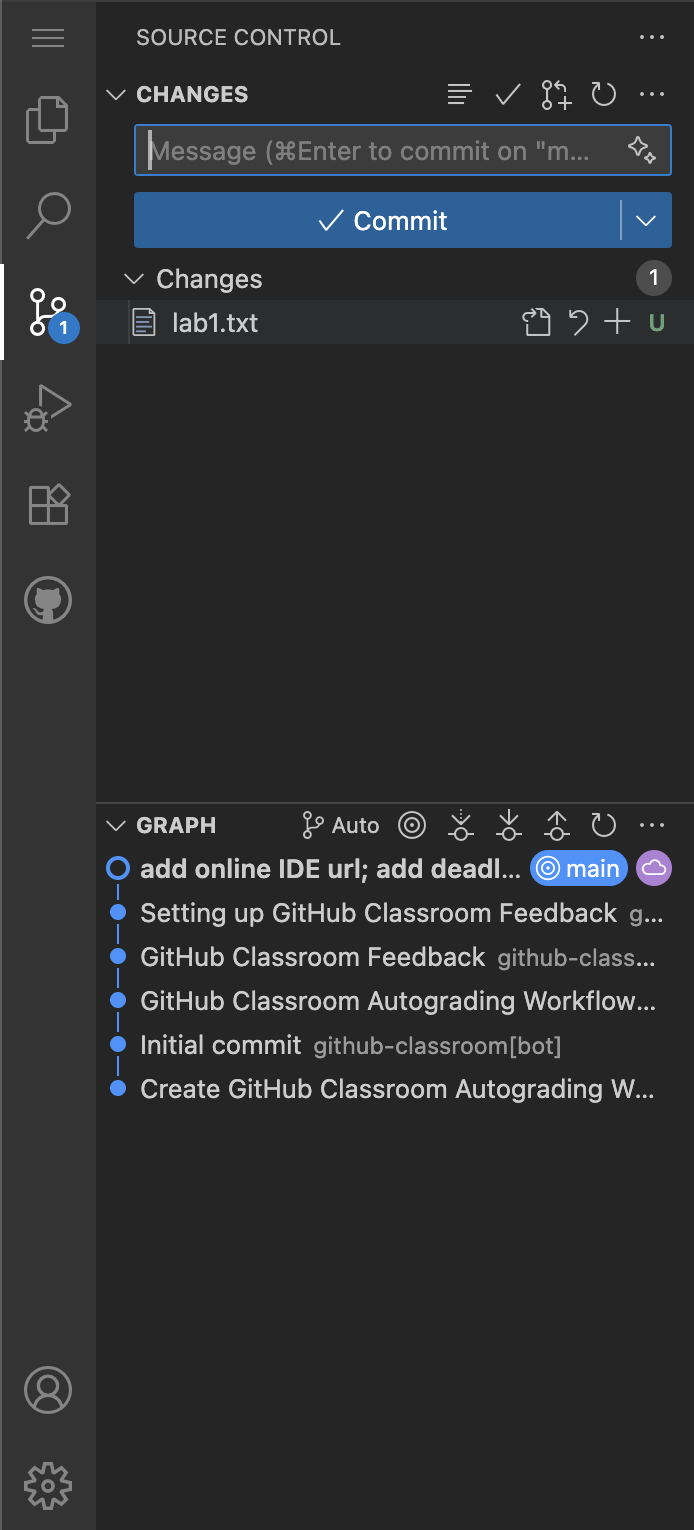
All of your changes, including deleted or created files, will appear in this window. You need to click the blue “Commit” button to send your changes to the server. This is required for the instructor to view the changes and grade your assignments. You may create as many “commits” as you like.
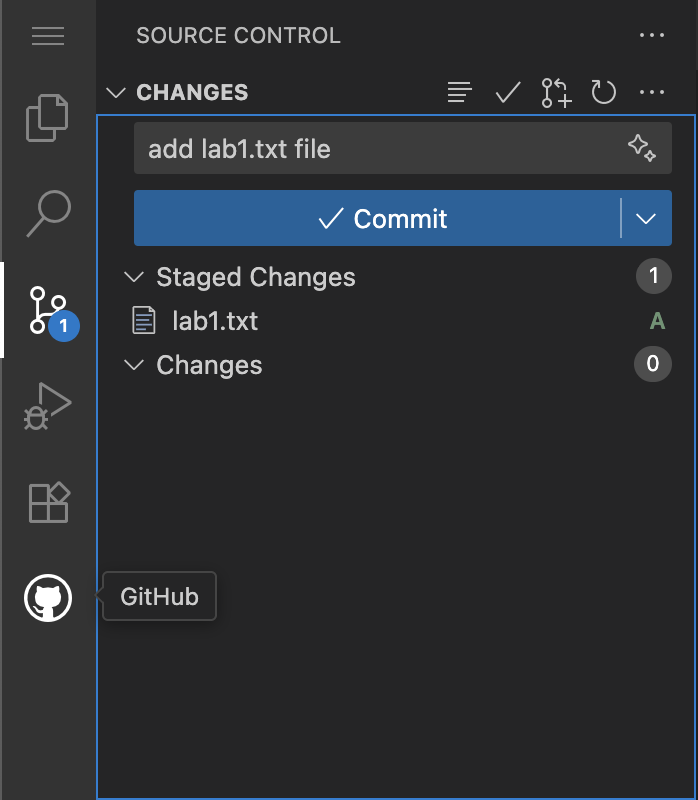
After committing changes, you then “sync” them with the server. This is related to how the source control tool “Git” functions. We will learn more about Git in a later assignment. Just remember to always “Commit” then “Sync” your code.
NOTE
If you have questions or encounter issues with an assignment, please commit and sync your changes before contacting the instructor. This allows for a quick review and line-based feedback directly within GitHub.
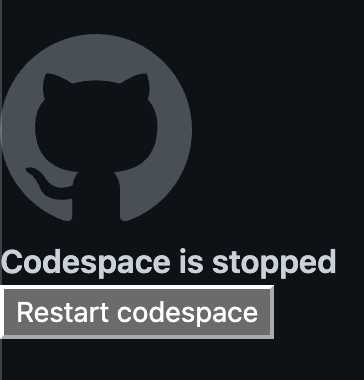
§4.4 Restarting Codespaces #
Your Codespace will shut down after idling for a short time. You can always restart your Codespace by either reloading the page or clicking the “Restart Codespace” button. Your “uncommitted” file changes will be stored for up to 5 days. Always commit and sync your changes to store them permanently.
§5 More about Visual Studio Code #
This was a basic introduction to Visual Studio Code. If you want to learn more about how to use VSCode, check out these beginner tutorials:
- (video) https://code.visualstudio.com/docs/introvideos/basics
- https://code.visualstudio.com/docs/introvideos/basics
You now have everything you need to start working on course assignments, If you have any questions or issues, please message the instructor.