The assignments in this course involve working with real database software. In this class, you will learn and practice SQL using postgres and sqlite. These database instances will be running directly on your own computer. A practical database installation can involve multiple components which must be properly configured to work together.
To make the set-up process as simple as possible, we will use a containerization software called Docker. This software makes it easy to package and share software and configurations across computers. For each assignment I will provide files that will enable you to easily launch a pre-made database to use for your assignments.
This page serves as a simple tutorial on the very basics of Docker, so that you can use it to launch various databases to work with throughout this course.
Note
Advanced users may use other OCI-compliant container engines, such as podman, as long as you know how to work through any compatibility issues.
§1 What is a Container? #
A container is a lightweight, executable package that bundles an application with all its necessary components, such as code, runtime, libraries, and configuration files. This ensures that applications can run consistently across different systems, regardless of the underlying operating system.
§2 Docker Install Instructions #
Instructions for installing Docker Desktop here
I also strongly recommend installing a lightweight text editor such as:
- Visual Studio Code (I use this) (NOT to be confused with “Microsoft Visual Studio”)
- Notepad++
§3 Using Docker #
Docker is primarily interacted with from the command line. To start, open a terminal application such as command prompt or terminal.
Start by typing docker ps
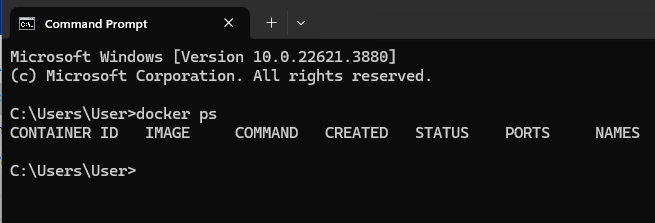
The docker ps command shows all running containers. You should have no containers running. You can run this command at any time to list currently running containers.
§4 Launching Your First Container #
In your terminal, type docker run --rm -it hello-world
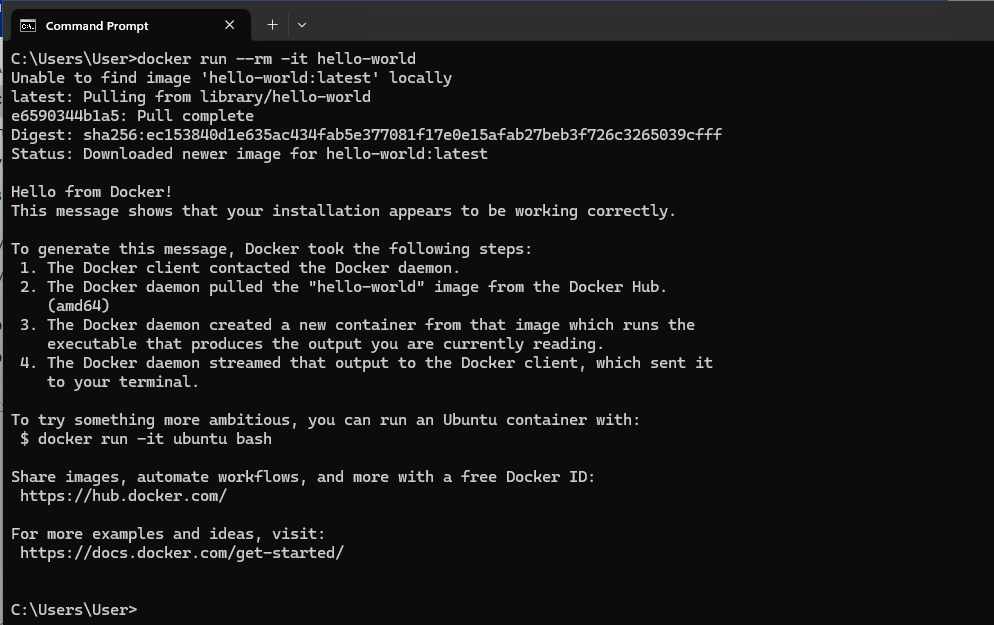
Docker downloaded the example hello-world application, launched it, printed the output, and exited.
§5 Running Docker-Compose Files #
Using Docker, you can run more complicated software using only a few files. This will be the primary way you will interact with assignments in this class.
For this example, we will launch a simple webserver.
First, download the following docker-compose.yaml file to your Downloads directory.
To use this file, first open a terminal and then type cd Downloads. This command instructs the terminal to navigate to the Downloads folder, similar to opening the folder in File Explorer/Finder.
Now, type docker-compose up
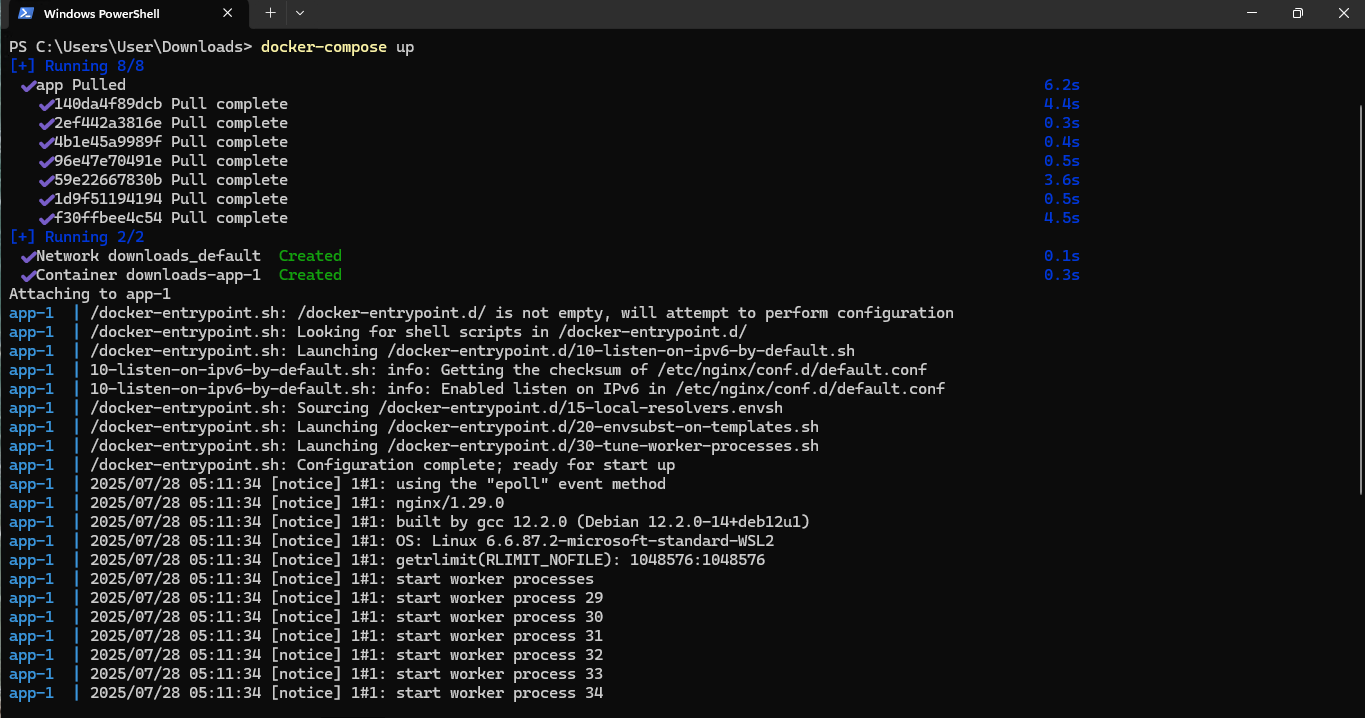
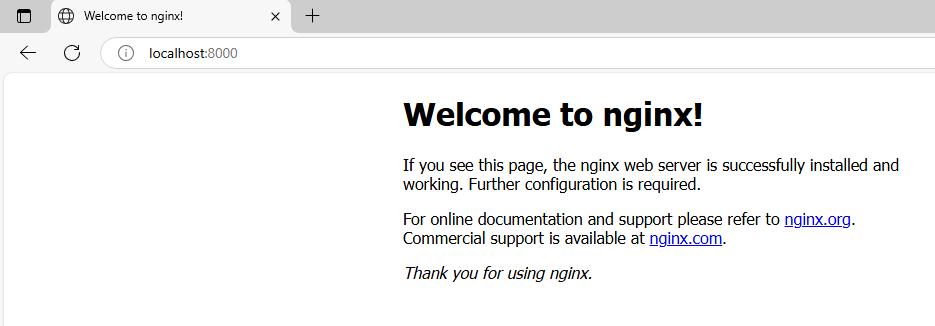
This will download the software, launch it, and print the live log as the software runs. After the webserver starts, you can access it in your web browser at http://localhost:8000.
Finally, to stop the server, open the terminal window again and press the CTRL + C keys. This will tell the server to shut down and exit.
§6 Organizing Your Files #
Docker only works with a single docker-compose.yaml file per directory, because of this, it is important to keep each Assignment’s files organized in separate directories.
I suggest organizing your files with a simple structure like this:
Documents
├── Assignment1
│   ├── docker-compose.yaml
│   ├── init.sql
│   ├── README.md
│   └── workdir
│       └── test.sql
└── Assignment2
    ├── docker-compose.yaml
    ├── init.sql
    └── workdir
With this file structure, you can launch the Assignment2 database server with these commands:cd Documents/Assignment1 and docker-compose up
§7 What’s Next? #
Assignment 1 will ask you to run a simple docker container to verify that you are prepared to run databases for the other assignments.
§8 More Info (optional) #
Docker is not a focus of this course, though we will utilize it as a tool to distribute and run software. For anyone who is interested in learning more about Docker, here are a few well-written introductory guides: